Interior doors, although often left out, are a very important part of a home’s design. However, it is good that your style blends well with the rest of the atmosphere in the home. There are several types of interior doors and today we are going to focus on one of them in particular – sliding doors.

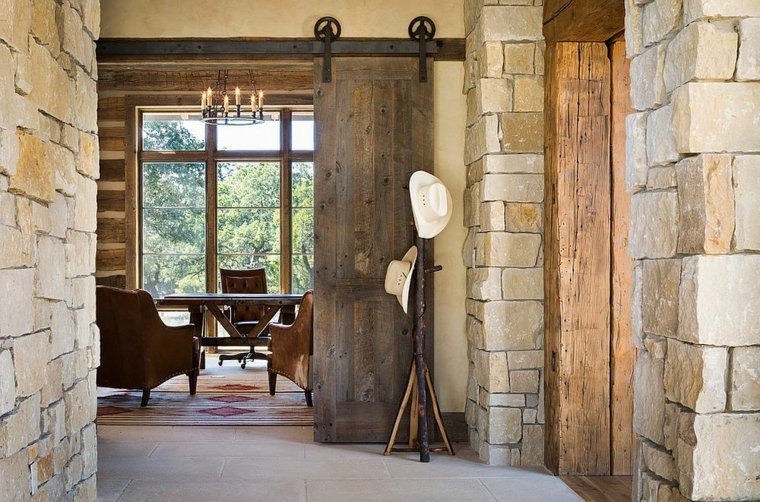
In addition we are going to offer you a tutorial on how you can make sliding barn-type interior doors that are very appropriate for the rustic style in the design that is very popular in recent years and is already combined obtaining very good results with other fashionable styles such as industrial and contemporary.

But let’s first see why we should choose sliding interior doors and what advantages and disadvantages they have:
Pros and cons of sliding interior doors:
The Advantages of Interior Barn Doors
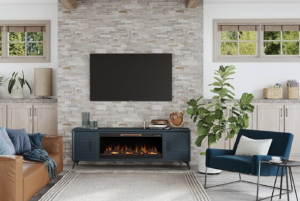
Unlike conventional doors, a sliding barn door does not occupy a usable area of the floor, so it adapts to small and crowded spaces, such as corridors and other small rooms where we want to use the space to the maximum.

Installing a barn door in the place of an existing opening is a simple DIY job, much easier than framing a hinged door or even more difficult to add a pocket door. As a bonus, the rustic look of barn door hardware is better suited to a rustic or industrial-style interior than many modern out-of-the-box doors.

Disadvantages
Barn doors, when open, can block light switches or electrical outlets and require enough adjacent wall to roll. Also, that wall space becomes difficult to use for placing art or bookshelves.

If you have decided to install one or more barn interior doors in your home, then we will help you with an easy and quite complete tutorial on how to make them with your own hands.

In this article, we’ll show you how to build a simple barn door, including how to treat new pine planks for a worn look.

How to start?
The 1 × 6 No. 2 pine boards we use for this door are inexpensive, so be sure to purchase several extras so you can experiment with aging and staining techniques before getting started on the boards you’ll be using for the door itself. Preparing the tables is the most time-consuming part of this project. Expect to spend several hours cutting the grooves on the edges of the boards. We use a router with a bit to cut the rewinds; a table saw with a set of rebate blades would be faster.
The table before and after aging

The cup type wire brush and grinder we use make the initial crafting to get an aged look a quick job. It took us about 10 minutes per board. If you don’t own a grinder, you can buy one for around $ 30 to $ 150. A cheap one will work well for this project. You could also use a knot-shaped wire brush mounted on a corded drill, but it would take longer to achieve the same results.
Staining is done quickly, but wait a day or two to get the parts cut and finished. The materials you will need for the barn door range in price from about € 250 to € 500 depending on the size and style. Some companies have ready-to-ship options, but you should plan ahead if you need something else, as it usually takes longer to get it.

Midas the opening
Whether you are building a door with your own hands or ordering one, knowing the exact size of the door is essential. Sliding doors must extend at least one inch beyond the edges of the opening that are not trimmed, or one inch beyond the trim of the trimmed openings. You can add more overlap for more privacy. To determine the width of the door, add at least 2 inches to the width of the opening, or the outside dimensions of the door edge (Photo with step 1).

Choose the rails before determining the height of the door. Then refer to the measurement instructions or enlist the help of the manufacturer to arrive at the height of the door. In most cases, measure to the top of the opening without the trim, or to the top of the trim, and subtract 1/2 inch. This measurement will give you the minimum required door height.

Finally, you need to make sure you leave enough clearance above the opening to lift the door onto the track. This distance varies by rail, so again, check with the manufacturer.

Three sliding options
Before you start shopping for the rails, take a good look at the area where you want to install the door and find out which configuration would work best. If you want to cover the opening with a door, you will need an area on one side of the opening that is wide enough for the door. Make sure there are no obstructions such as light switches, fixtures, or heat registers that could be covered or interfere with the door. If there is not enough room on the wall to one side of the opening, you can install a pair of doors that slide to opposite sides or purchase a special bypass rail that allows the doors to stack.
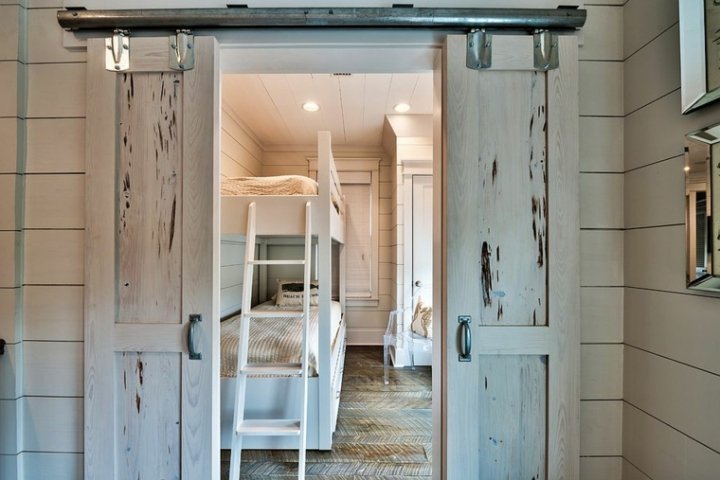
Interior barn doors – single door

Single door
This is the most popular option, but you will need enough wall space. Order a track that is at least twice as wide as the door.

Double interior doors
If you don’t have enough wall space on one side of the opening for a single large door, you can use two doors instead. Centering the track in the opening will allow the doors to slide to either side of the opening.

Overlapping doors
If you want to install sliding doors in a closet opening or a wall-to-wall opening, you can order a bypass rail that allows you to stack the doors on one side of the opening. In this case make sure that the space that remains is sufficient to pass, otherwise you will have to think about the installation of a conventional door.

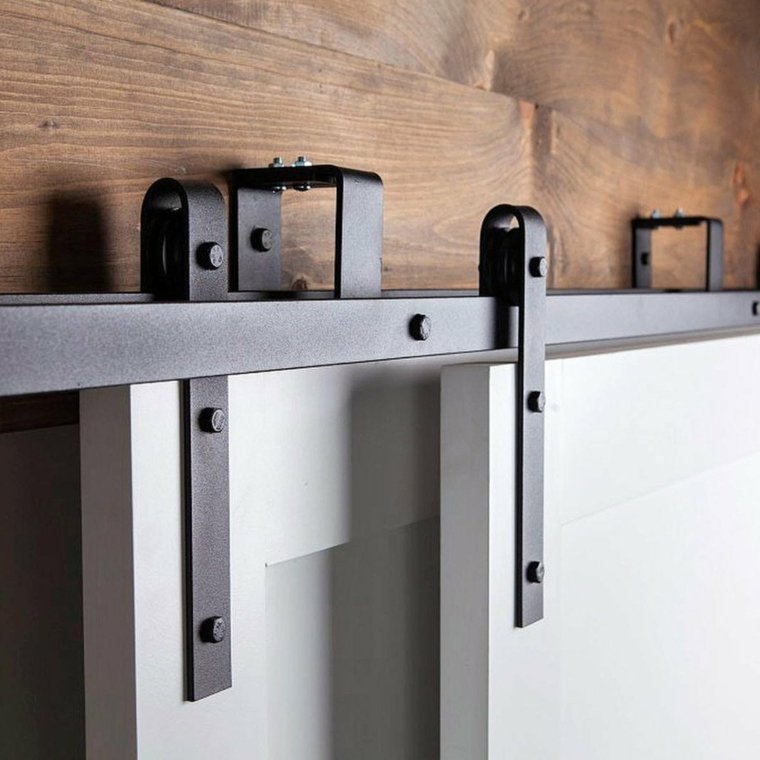
3 ways to install the rails
To support a solid door, the track must be solidly mounted to the wall. There are three options to do this job. First, you can install a continuous wood backing between the wall studs at the height of the track. This allows you the freedom to install track mounting bolts in any location. But this method is not practical in a newly finished room because you would have to remove the plaster to install the backing.

The second option is to mount a board to the surface of the wall (as seen in the photo above), making sure it is screwed tightly to the posts, and then screw the rail to the header board. Manufacturers recommend a maximum door weight of 35 kg if you are using this method because the bracket screws will only engage 3/4-inch thick wood.

The third option is to bolt the rail directly to the studs. You have to do two things if you choose this method. First, be sure to order an undrilled rail. You will need to drill yourself in the places of the posts. And second, ask the supplier to recommend a type of rail that will avoid crushing the drywall. Most vendors have smashed plates or something similar to solve the problem.

Some companies offer spacers of different lengths, while others supply spacers of adjustable length. The length of the spacers is determined by the track mounting method, whether there is an edge around the door or on the ground that you need to overcome and the thickness of the door. Make sure to clarify this with the supplier before placing your order to be sure you are getting the correct length spacers for your door.
Guide on the ground
You will also need a guide on the floor to prevent the bottom of the door from swinging. The simplest guide is an L-shaped metal bracket that mounts to the floor and fits into a slot cutout at the bottom of the door. If your door doesn’t have a slot, there are adjustable roller guides that will work. Choose the guide that best suits your door.

Sliding interior doors – instructions for carrying out the project:

1. Make grooved boards
We used inexpensive 1 × 6 No. 2 pine boards, cut grooves in the edges to make grooved boards, and aged and stained them to resemble old barn wood (optional).

When you choose the boards, don’t worry about knots or scratches. But try to choose boards that are straight and not cupped or warped. We divide the width of the door by the width of the board to see how many boards we would need. And then we adjusted the width of the boards until they were all the same. When doing the math, remember to count the groove edges. For our 1.2 meter wide door, we cut each board 5 inches wide. Yours may be different. Cut the boards to the correct width and cut the grooves on the edges of all but two boards. Cut a rebate into two boards to be used on the outer edges. We also cut the boards to the correct length before aging so that we could make the ends look aged as well.

2. Scrape the boards with a grinder
When all the parts are cut, you’re ready for the fun part – aging the boards. The photo above shows how to use a brush knot cup mounted on an angle grinder to abrade softwood. This gives the wood a weathered look. Pieces of wire can break off and cause serious injury if it is not protected and there is a lot of dust. Be sure to wear safety glasses, hearing protection, and a good quality dust mask. Start by nailing the board to the ridge with finish nails to hold it in place. The nail holes will add to the rustic look. Tilt the grinder so the wheel is aligned and parallel to the grain to abrade the softwood. Use the wire wheel on the edges and ends of the board to create an uneven and worn look. You can also keep the wheel flat on the surface and move it in an arc on the wood to resemble the saw marks. Don’t worry you can’t go wrong here. Aging the wood in any way will look great.
3. Make wormholes
If you want to take wear to the next level, use an awl to create “wormholes.” You don’t have to punch holes in every board. Some variety will add authenticity. Drag a screwdriver or other sharp object along the grain to create a false crack. Use your hammer claw or any other heavy tool or object to create dents. When you’re done aging your boards, it’s time to stain them.

4. Apply a base coat of stain
To achieve the look you see here, start by applying a base coat of light gold stain to the boards (Photo above). We apply the stain with a mini roller to speed up the process. Wipe off excess stain with a cloth.

5. Add dark spots
Then use a rag to apply an uneven layer of dark spot in a random pattern. Next, spread the dye touches to create dark areas and streaks. Wipe off excess with a different rag to reveal some of the base coat color.

Below you can see some images of sliding interior doors to get more original ideas: